Every technological device, no matter how sophisticated, inevitably encounters challenges throughout its lifespan. When a fundamental component, such as a keyboard, malfunctions, it can severely impair the user experience. If you find yourself grappling with a detached keyboard on your Motorola device, do not despair. This comprehensive guide will empower you to restore its functionality swiftly and effectively.
Restoring your keyboard’s full capabilities entails a straightforward yet methodical approach. To ensure precision and efficiency, we meticulously guide you through each critical phase. By meticulously following our step-by-step instructions, you can restore your device’s seamless functionality and enhance your overall user experience.
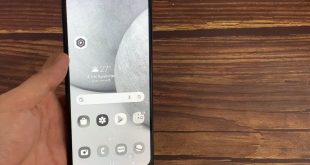
Identifying the Keyboard Type
Table of Contents
Prior to commencing the reattachment process, it is imperative to ascertain the specific keyboard type associated with your device. Different models and generations of Motorola phones may utilize distinct keyboard designs, each requiring a tailored approach to the reattachment procedure.
To facilitate this identification, consult the following table, which outlines the different keyboard types employed by Motorola phones and their corresponding identifying characteristics:
| Keyboard Type | Characteristics |
|---|---|
| QWERTY | Traditional keyboard layout with 26 alphabetic keys arranged in QWERTY order |
| Alphanumeric | Numerical keys arranged in a grid, typically with fewer than 10 digits |
| Touchscreen | Virtual keyboard projected onto the phone’s display, with keys activated by touch |
| Slide-out | Keyboard concealed beneath the screen, sliding out for use |
| Flip-open | Keyboard located on a second screen that rotates open |
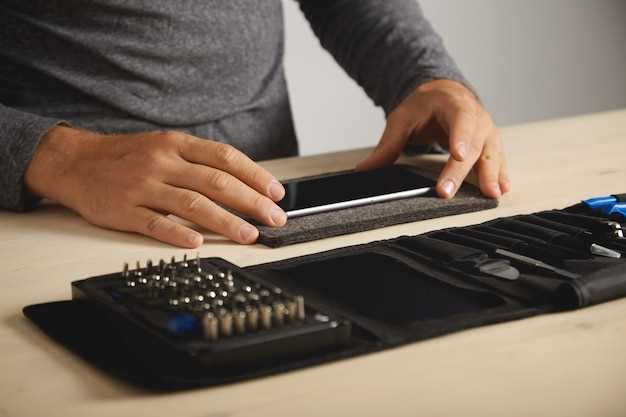
Gathering Essential Tools
Before embarking on the reattachment endeavor, it is imperative to gather the requisite materials that will facilitate the successful execution of this task. These tools are akin to the building blocks of a successful repair, and their assembly is paramount to achieving the desired outcome.
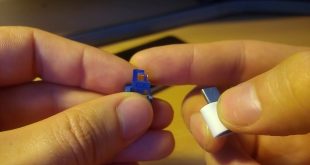
Disconnecting the Keyboard
Before embarking on the reattachment process, it is crucial to remove the keyboard from its current positioning. This section will provide meticulous instructions on how to detach the keyboard effectively.
Aligning and Connecting the Keyboard

A crucial step in the process of reestablishing your device’s functionality is aligning and connecting the keyboard. This action requires meticulous execution to ensure the proper functioning of the input device.
| Step 1: Keyboard Alignment | Carefully position the keyboard over its designated slot, aligning the connectors on both ends. |
|---|---|
| Step 2: Secure the Framework | Using the appropriate screws or latches, firmly secure the keyboard in place. |
| Step 3: Connect the Ribbon Cables | Carefully insert the ribbon cables into their respective sockets on the motherboard. |
| Step 4: Test the Connection | Power on the device and verify that the keyboard inputs register on the screen. |
Securing the Keyboard
Once the keyboard is reattached, it’s essential to ensure it remains securely fastened. This section provides a comprehensive guide on how to securely attach your keypad, preventing it from detaching or causing any malfunctions.
Materials Required:
| Item | Quantity |
|---|---|
| Screws (as per device model) | 2-4 |
| Screwdriver (compatible with screw size) | 1 |
Troubleshooting Common Issues
If you encounter any difficulties during the reattachment process, this section provides solutions to common issues. Troubleshooting can assist you in resolving any potential problems and ensuring a successful reattachment.
QA:
I’m having trouble finding the right replacement keyboard for my Motorola phone. Where can I find one?
You can purchase a replacement keyboard for your Motorola phone from Motorola’s official website, or from authorized retailers such as Amazon or Best Buy. Ensure the keyboard is compatible with your specific phone model.
Is it difficult to reattach the keyboard to my Motorola phone?
No, reattaching the keyboard to your Motorola phone is relatively straightforward. However, it’s crucial to follow the steps outlined in the user guide or online tutorials carefully.
What tools do I need to reattach the keyboard to my Motorola phone?
In most cases, you won’t need any specialized tools. A small Phillips head screwdriver or a SIM card removal tool may come in handy, depending on your phone model.
After reattaching the keyboard, the keys are not working properly. What should I do?
First, ensure the keyboard is securely attached and all connections are properly seated. If the issue persists, try cleaning the contacts on the keyboard and the phone with a soft, dry cloth. If the problem continues, contact Motorola support for assistance.
I reattached the keyboard, but now my phone is not powering on. What could be the problem?
This issue may indicate a more serious problem with your phone’s hardware. It’s recommended to contact Motorola support immediately or take your phone to an authorized repair center for professional diagnosis and repair.
How do I know if my Motorola phone’s keyboard needs to be reattached?
Your Motorola phone’s keyboard may need to be reattached if it has become loose or detached from the phone. This can be due to a variety of reasons, such as a fall or a manufacturing defect. If you are unsure whether your keyboard needs to be reattached, you can try gently wiggling it. If it moves or feels loose, then it is likely that it needs to be reattached.