Embark on a journey to seamlessly integrate your essential mobile connection. In this comprehensive guide, we unveil the intricacies of inserting a SIM card into your Samsung Galaxy J7, empowering you with the knowledge to establish seamless communication and unlock the full potential of your device.
Before delving into the technicalities, let us address the paramount significance of a SIM card. This diminutive yet indispensable component acts as the gateway to your cellular network, granting you access to voice calls, text messages, and high-speed data transmission. Its insertion marks the commencement of your mobile journey, connecting you to the digital realm.
How to Insert SIM Card in Samsung Galaxy J7
Table of Contents
Begin the process by gathering your essential tools: a SIM card and the included SIM ejector tool. Next, locate your phone’s SIM card tray on the side. With the ejector, gently press into the tray’s small hole and extract it. Carefully align your SIM card within the tray, and remember its correct orientation if it’s a nano-SIM or micro-SIM. Slide the tray back into its designated slot until it clicks securely into place. Communicate with your network to activate your SIM, and you’re ready to enjoy cellular connectivity on your Samsung Galaxy J7.
Locate the SIM Card Tray
To begin the SIM card insertion process, you must first locate the dedicated SIM card tray on your Samsung Galaxy J7 device. This tray serves as a secure housing unit for the SIM card, which enables your device to connect to a mobile network and access cellular services.
| Identifying the SIM Card Tray | Suggested Actions |
|---|---|
| Examine the device’s exterior for a small, rectangular opening or slot. | This opening typically indicates the presence of the SIM card tray. |
| Inspect the edges of the device for any tiny indentations or notches. | These indentations may provide a grip point for opening the tray. |
| Gently probe or press around the detected opening to identify a slight protrusion or lever. | This protrusion or lever is often used to eject the tray. |
Remove the SIM Card Tray
To remove the SIM card tray, you need to locate the small hole or notch on the side of your device. This is usually located on the left or right side. Once you have found the hole, insert a SIM ejector tool or a thin, sharp object into it. Gently push the tool into the hole until the tray pops out.
Carefully pull the tray out of the device. You will see the SIM card installed in the tray. To remove the SIM card, gently push it out of the tray.
| Part | Description |
|---|---|
| Tray | The removable part that holds the SIM card. |
| Ejector Hole | The small hole or notch used to eject the tray. |
| SIM Card | The small, removable card that stores your phone number, contacts, and other data. |
Insert the SIM Card

The initial step in utilizing the full potential of your mobile device is to implant the Subscriber Identity Module (SIM) card, a crucial component for connecting to a cellular network. Inserting this module is a straightforward process that can be accomplished effortlessly by following the subsequent guidelines.
Reinsert the SIM Card Tray
Once you have inserted your SIM card, it’s time to reinsert the SIM card tray into your device. This is a simple process that can be completed in a few quick steps.
Note: Ensure that the SIM card is correctly inserted in the tray before proceeding with reinsertion.
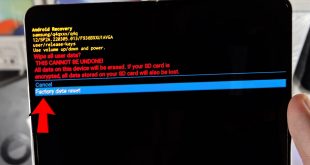
Power On Your Phone
Proceed to the next crucial stage–activating your device! This process initiates the device’s functionality, allowing you to access its capabilities.
| Step 1: Locate the Power Button | Identify the physical button designated for powering on the device. It is typically found along the side of the phone. |
|---|---|
| Step 2: Press and Hold the Power Button | Exert pressure on the power button and maintain it for a few seconds until the screen illuminates. |
| Step 3: Wait for the Startup Sequence | The phone will initiate its startup process, which involves loading the operating system and essential applications. |
Confirm SIM Card Activation
Once you have successfully inserted your SIM card, it’s crucial to ensure it has been activated. This allows your device to connect to the network and access essential services such as cellular data, voice calls, and text messaging.
Q&A
Where is the SIM card slot located on the Samsung Galaxy J7?
The SIM card slot on the Samsung Galaxy J7 is located on the left side of the device, near the bottom. It is a small, rectangular slot with a small hole for the SIM card ejector tool.
What size SIM card does the Samsung Galaxy J7 use?
The Samsung Galaxy J7 uses a nano-SIM card. This is the smallest size of SIM card and is used in most newer smartphones.
Do I need to turn off my Samsung Galaxy J7 before inserting the SIM card?
No, you do not need to turn off your Samsung Galaxy J7 before inserting the SIM card. However, it is recommended that you power off the device before removing the SIM card.
Can I use a SIM card from another carrier in my Samsung Galaxy J7?
Yes, you can use a SIM card from another carrier in your Samsung Galaxy J7. However, you may need to contact your carrier to activate the SIM card and ensure that it is compatible with your device.
I have a Samsung Galaxy J7, but I can’t find the SIM card slot.
The SIM card slot on the Samsung Galaxy J7 is located on the left side of the phone. It is a small, rectangular slot that is covered by a flap. To open the flap, simply use your fingernail or a small object to pry it open.